


Remember this card from yesterday? Well, here is a simple, simple tutorial that shows you how I created that background.
This is the finished card that I made for this tutorial - and we'll get into some of the mistakes in it in a moment!
First - here are the supplies that you will need:
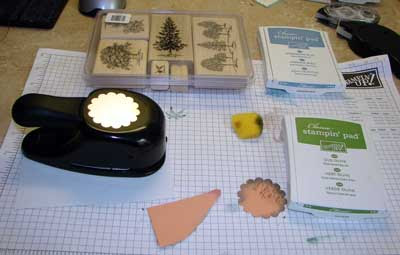
You'll need the scallop circle punch, some scrap paper, your cardstock for your card base, and some more if you choose to embellish it (the oval on mine), and some light neutral cardstock for the front. (Hint: A card front layer is 4"x 5 1/4")
Now onto the clouds! I cut off a bit of sponge for every new project that I make (it makes clean up easier and makes the sponge go a bit further!) Oh, I also have one that is about an eighth of the sponge that is purely for Basic Brown - the color that I most often sponge with!
Now, after you have punched out the scalloped circle, place it just down from the top of your paper. Put some ink on the sponge and wipe it down from the scrap paper. Move it to another area, overlapping the scallops a bit and repeat. Keep doing that along the top of the paper until you are happy with the look. Then make sure that you sponge the edges as well where the clouds are to fill them in a bit.

Now onto the grass! Just rip a bit of scrap paper so that it has a little bit of a curve, and place that above where you want the grass to be. In the same way that you did the clouds, sponge down from the paper. If you do this wrong, the hills will look wrong (and yes, I DO know that from personal experience!!!!!)
Oh - just a quick hint: If you do stuff up one side, remember that Stampin' Up! papers are two sided and so you can just flip it over and start again on the other side!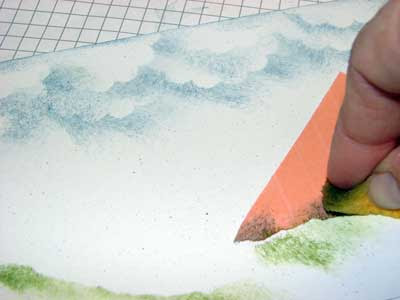
 Now you just have to put in any other images you want and embellish it!

This is what your finished background will look like - except that of course, yours will be in focus!!!!!!
 Now you just have to put in any other images you want and embellish it!
Now some more hints - if you have a look at the oval image on mine - I used the Old Olive marker to just ink up that tiny bit of the stamp, but I caught some of the hill for the next set of trees. BIG HINT: when you do this technique, use a blender pen to wipe off the excess to get a clean image.
Next thing - use the stamp-a-ma-jig when you need to get word on! Mine are really crooked - but that's what you get when you are totally impatient!!!!!
So there you have it! Now go ahead and create your own sponged background!
You can place an online order here to get your own products to create a masterpiece like this!
Or book your won workshop and we can make a card like this for all of your friends! Email me to book a date.
Recipe:
Stamps: Lovely As A Tree, Teeny Tiny Wishes
Paper: Brilliant Blue (card base), Bordering Blue, Naturals Ivory
Ink: Old Olive, Bordering Blue, Basic Brown
Ink: Old Olive, Bordering Blue, Basic Brown
Accessories:Sponges, Scallop Circle punch
Hugs
Megan


0 comments:
Post a Comment